LeMieux Merino+ Half-Lined Saddle Pads: The Unsung Hero of Pads

White quilted dressage saddle pad (left) and close contact saddle pad (right) with natural color wool and a black LeMieux logo.

While most horses can wear any saddle pad their rider places on their backs, some horses aren’t so lucky. They experience the agonies of extra-sensitive skin, seasonal hives, allergies to manmade textiles, seasonal or year-round hair rubs, abrasions from friction, thin hair, excessive sweating under a saddle or a host of other challenges, including collagen bumps and fungal issues in follicles.

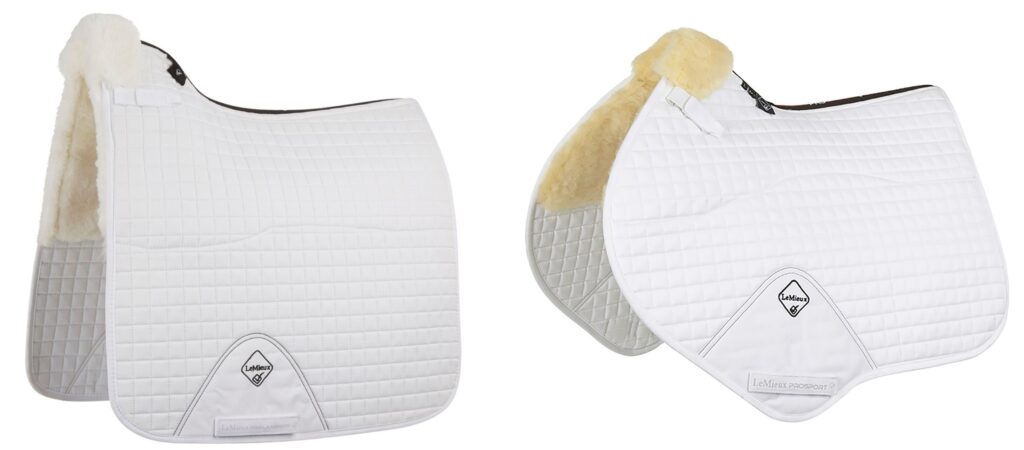
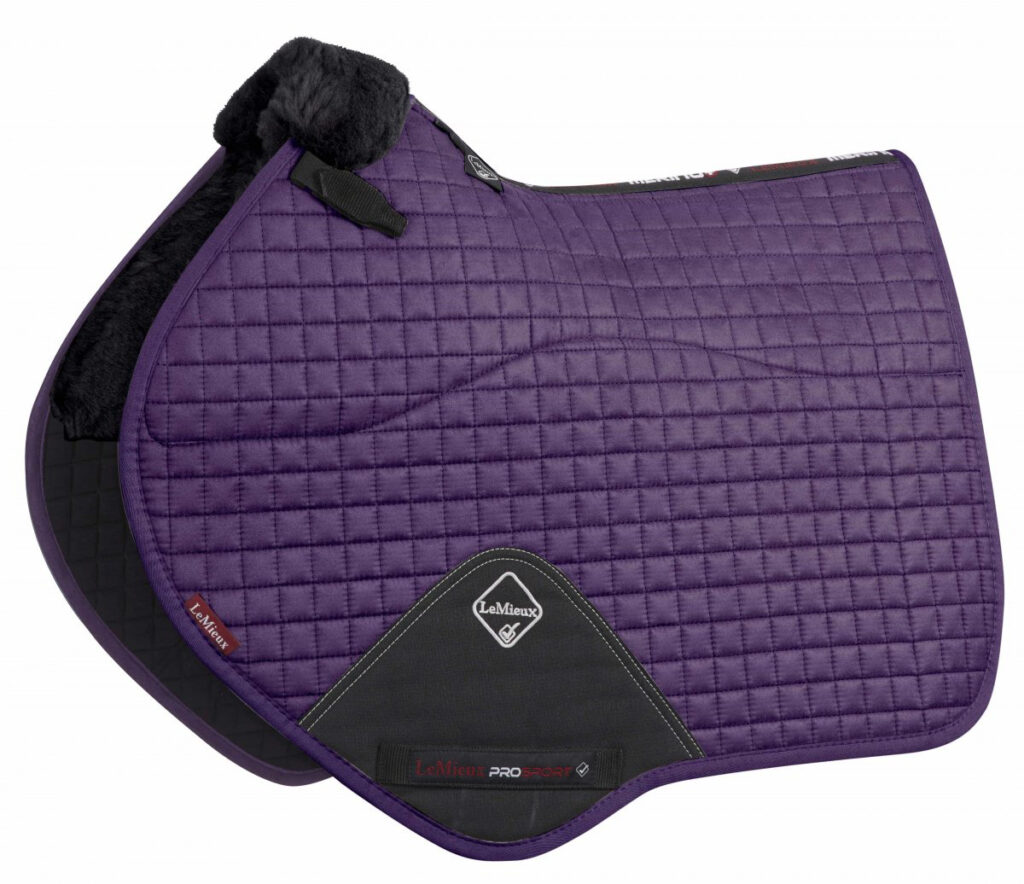
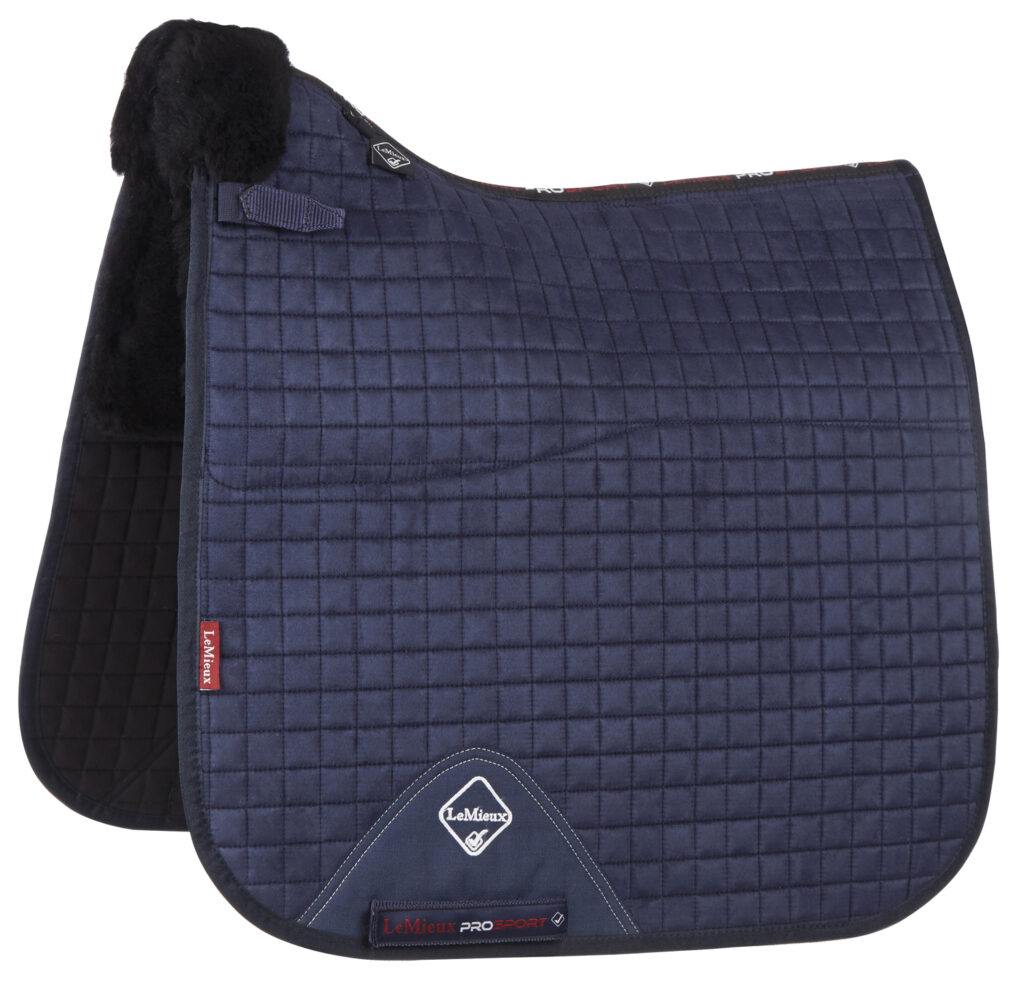
If you ride one of these horses, a Merino+ Half-Lined Dressage Square or Close Contact Square could be the solution to your horse’s troubles. Merino+ pads have proven so beneficial to horses that we’ve come to think of them as the Unsung Hero of pads.

A Thoughtful Approach to Wool Fleece
Across disciplines, natural wool is known to be the best option for a horse’s back. It offers softness and cushioning, superior breathability, helps maintain temperature and regulates moisture. It also naturally controls the breeding of bacteria and viruses and helps prevent bruising, scarring, chaffing and pressure sores.

The problem with traditional wool fleece pads is the hide hidden inside them. Even with the best care, the hide eventually becomes warped, misshapen or brittle. LeMieux took a thoughtful approach to solving longevity issues experienced with traditional sheepskin fleece pads; with the Merino+ line, no hides are involved. The pads use top-quality WoolMark accredited Australian merino wool and beautifully engineered fabrics. The resulting saddle pads remain soft and withstand daily wear and machine washing.

With Merino+ pads, lambswool is removed from skin and integrated with a unique backing fabric that expands and contracts while retaining its inherent stretch. This fabric aids wicking and moisture control, with each fiber holding up to 30% its weight. The effect of this fabric alone helps keep a horse’s back cooler and drier, and temperature variations are minimized. Add to this all the natural benefits of merino wool, and you’ve got an amazing saddle pad.

Cushioning & Shock Absorption

The consistent density of springy Merino+ wool fleece provides a perfect fit against a horse’s back in every ride. Its soft surface and resilient nature let the fleece mold to a horse’s contours without adding bulk. The fibers help absorb impact, distribute pressure and provide cushioning.

Hypoallergenic & Gentle on Skin
The lambswool, dyes and fabrics used in Merino+ pads are tested to human medical standards by a Swiss laboratory, so they work in harmony with even sensitive skin and are far more stable. The fluffy fibers free the horse from saddle-pad friction, naturally resist static and naturally resist odors.

Thermoregulating & Moisture-Wicking
Some folks look at the wool panels and think, “That’s going to be hot against my horse.” Nothing is further from the truth. Merino wool naturally wicks moisture and promotes airflow. Whether the weather is hot or cold, the wool helps maintain a comfortable climate under the saddle. (Try wearing merino wool socks in summer to prove this point. Your feet won’t sweat, and they won’t stink at the end of a long day.)

Close Contact Feel
Merino+ fleece is placed in panels only under the saddle. The flaps of the pad aren’t lined with fleece, so they feel to a rider just like a “standard” quilted saddle pad. With the fleece panels at the top, most riders with an appropriately fitting saddle have no need to use a half pad.

Quick Drying
The fleece panels dry quickly between rides and after washing. Dirt, hair and dried sweat brushes away. Usually, a freshly laundered pad is ready to use next day.

Other Points to Note

Now that we’ve covered all the irresistible problem-solving benefits of Merino+ Half-Lined Saddle Pads, we must point out a few more must-have features.

  • Finer and shorter wool lines the pathway of the spine, providing comfort for spinal processes and allowing airflow. A swept-up wither cut relieves pressure over the shoulders and base of the neck.
  • LeMieux’s signature layered girth-loop system ensures a perfect fit adjustment with every girth on every horse. The top layer acts as a normal girth loop. The inter-locking layer underneath can be used to secure either or both saddle billets in an ideal position.
  • Timeless style, a classic quilted top, conservative colors and fleece-trimmed withers mean this pad is always appropriate in any ring.
  • The pads generally require less laundering when used on a groomed horse. Simply brush hair away from the fleece fibers!

LeMieux’s Merino+ Half-Lined Dressage Square fits most dressage saddles perfectly and creates an elegant look worthy of competition. The Half-Lined Close Contact Square suits most jump saddles and includes the iconic, swept-up back to avoid interference with the rider’s legs over fences.

Shop the LeMieux Merino+ Half-Lined Close Contact Square

Shop the LeMieux Merino+ Half-Lined Dressage Square

Already have a LeMieux Merino+ Pad? Share your photos with us on Instagram and Facebook by tagging @doversaddlery!

Spring Cleaning: The Wise Rider’s Way

The right hand and torso of a person wearing a zip up hoodie is shown cleaning their black dressage saddle with saddle soap. The saddle is sitting on a wooden fence. Next to it are a pile of bridles also hanging on the fence.

Welcome March, the month when some folks embark on home spring-cleaning frenzies. Around here, our idea of spring cleaning focuses on tack. Spring marks a perfect time to thoroughly inspect and recondition your horse’s leather tack, whether you’ve competed in warm places all winter, continued training despite frigid temps, or simply enjoyed downtime with your horse.

If you’re like us, signs of wear or gradual decline in leather condition are easy to ignore in busy daily riding routines, and repairs are easy to postpone. These issues can be addressed best now, with ample time for repair or replacement, before local riding activities gain full swing. As added benefits, reconditioned tack is more comfortable for your horse to wear, safer for both of you, and it supports a maximum return on your investment.

Inspect All Tack

Just as your skin suffers abrasions and dryness from irritants such as sand and sweat, your leather does, too. Regular use can degrade leather even if you diligently wipe away grime as recommended after every ride. Saddles and bridles that have been stored improperly can dry out, grow mold and mildew or be compromised by rodents, sunlight, varying temperatures, and other environmental factors.

Look closely at each piece of your horse’s leather tack for areas under pressure during use or where sweat or saliva may collect, such as:

  • Reins and cheek pieces where they attach to bit rings.
  • Saddle billets where they buckle to the girth.
  • Stirrup leathers where irons and buckles cause creases.
  • Girths along the full length, from buckles to elastic inserts to linings.   
  • Halters where hardware meets leather.  
A close-up of a stirrup iron attached to a stirrup leather is shown. The stirrup leather is dark brown, almost black and the stirrup is made of shiny black metal.
A close-up is shown of a stirrup leather attached to the hook of a saddle underneath the protective flap.
The underside of the crown piece of a blue halter is shown against a dark grey background. The blue leather is cracked and worn.

Any cracked or torn leather may break at the worst time—during a ride or while handling a horse. These areas indicate hazard and necessitate repair or replacement. Check that all stitching is tight and intact; loose stitching on stirrup leathers, saddles or girths also poses risk.

Inspect and touch any surface that lies directly against your horse, such as girth linings or padding in bridles and halters. Although not an immediate safety hazard, any item that feels rough should be budgeted for replacement or repair to protect your horse’s skin from chafing and to ensure optimal comfort.

Note: Some leatherwork professionals won’t repair reins, girths or stirrup leathers as a safety precaution. Saddle billet straps are replaceable, and some bridle and halter repairs are worth the expense. Generally, bridle parts and reins are readily replaceable at any budget to eliminate the need for repair.

Clean & Condition

When you’re satisfied with the quality of your tack, give it a thorough once-over using your favorite leather cleaner. Now is the time to take apart a bridle, martingale or breastplate and remove grunge from creases. Warm water and a soft toothbrush can help you get grime out of crevices. Turn your saddle upside down and clean all nooks and crannies. Once the leather is dry, follow up with a nourishing leather conditioner or leather balm.

Browse our entire selection of leather care products here.

Do you have an example of extreme tack wear? Share your photos with us on Instagram and Facebook by tagging @doversaddlery!

Time for a Halter Makeover

The neck and head of a brown horse wearing a brown leather halter is shown standing to the right side of the image. The horse is standing in front of a grassy field with jumps in the background.

As we handle our horses each day, we might not notice a problem developing with the way our horses’ halters fit. Leather halters in particular stretch with use, cleaning and conditioning, but even web halters with breakaway leather crowns can loosen over time.

A periodic review of your horse’s halter fit is a wise step toward keeping your horse safe and comfortable. A loose halter can slide off accidentally or ensnare a hoof; a halter that is too tight can dig into skin or interfere with a horse’s breathing, chewing or swallowing.

Many manufacturers offer halters. If you follow our fitting guidelines but cannot achieve a satisfactory fit on your horse, try a halter from a different manufacturer. A horse that is difficult to fit is best suited for a halter with a double-buckle crown and an adjustable chin.

Here’s how we like to ensure a proper halter fit:

1. Adjust the crownpiece, which will impact the placement of the noseband, the looseness of the throatlatch and the angle of the cheek pieces against your horse’s face. The crownpiece should fit over the poll, close to the back of your horse’s ears, but not press into them. Some halters have buckles on both sides of the crownpiece, and some have only one buckle on the left side. In the case of two buckles, try to use symmetrical holes for the crownpiece setting.

2. Check the noseband of the halter. It should sit about halfway between your horse’s eyes and nostrils, resting under the cheekbones so that the metal hardware joining the nose piece, chin strap and cheek piece does not press into the bones.

Adjust the noseband snugly using two to three fingers’ width between it and your horse’s face as a guideline. Some nosebands do not have buckles for adjustment. If this is the case with your halter, take extra care to be sure that you can obtain the optimum position of the noseband by raising or lowering the crownpiece with buckle, and that the noseband isn’t too loose or too tight.

If the cheek pieces are too long or the crownpiece is adjusted too loosely, the noseband will sit too low on your horse’s muzzle. In this case, it may impair your horse’s breathing or in extreme cases, slip over your horse’s nose.

3. Check the throatlatch, which should rest under your horse’s head where the neck meets the jowls. You should be able to fit three to four fingers into the throatlatch area to be sure your horse can breathe and swallow, but this spacing will not enable your horse to get a foot caught in that strap if he lowers his head.

4. Check the cheek pieces. Ideally, they should sit parallel to the cheek bones. If the throatlatch is too short or too long, or the crownpiece is not adjusted correctly, then the cheek pieces will not be able to run parallel to the cheek bones.

To browse our entire selection of halters, click here.

We want to see your #dovermodels in their halters, share your photos with us on Instagram and Facebook by tagging @doversaddlery!

Our New Year’s Resolution: Clean Brushes, Shiny Horse

Five brushes are in a metal basket that is hung on a wooden wall. The grooming brushes all have wooden handles with different colored bristles.

What better time of year than January to take a good hard look at your horse’s grooming tools? Do your brushes have dented bristles or are they clumped with sebum and grime? Are your curries dull or clogged with dirt and hair? You can maximize the health benefits of grooming your horse—and create an experience more enjoyable for both of you—by using clean brushes and replacing items that are worn out. Hygienic grooming tools care for your horse’s skin best and bring out your horse’s shine.

We recommend cleaning brushes and curries once monthly to remove buildup. If at some point you encounter a skin disease in your horse, be sure to isolate the brushes and curries used on the affected areas and clean them more frequently.

We love this economical and effective way of cleaning grooming tools: fill a bucket or sink with hot water and mix in Dawn® Dish Washing Liquid, which will lift out grease and rinse well. If the brushes are all synthetic with plastic handles, a splash of bleach can be added to the mix. Bleach is drying to natural-bristled brushes with wooden handles, so it should only be used on this type of brush when suspicion of skin disease or other equine illness is present. Another way to sanitize brushes is to add a moderate amount of Listerine® Mouthwash to the wash water—it smells fresh and can help kill bacteria.

Soak the brushes for several minutes, agitating them to loosen dirt. Rinse and repeat the process until the water is no longer discolored and you don’t see any soap suds. Rinsing thoroughly is important to prevent a buildup of soap residue in the brush bristles. Spread your clean horse brushes on a towel in a warm location or in the sun where they can drain and dry thoroughly before returning them to their storage tote.

A grooming tote made from black canvas is hanging from a metal pole. There are piles of hay bales in the background and the tote is filled with brushes, curry combs, hoof picks, and spray bottles.

As an added tip to get the most out of your brushes, always store them in a way that protects the bristles from being crimped or smashed. Many types of grooming totes are available, but no matter which you use, stand your brushes on end so that each is balanced on the tip of the handle. Alternatively, you can gently nestle the bristles of two brushes together so that they interlock for storage.

To browse our entire selection of grooming tools and other horse care items, click here.

We want to know how you love to spend time at the barn grooming your horse; share your photos with us on Instagram and Facebook by tagging @doversaddlery!

Tips from the Tack Room: Ward Off Pests

tips from tack roomNatural Pest Deterrent

Occasionally mice, moths or other insects make their way into a tack trunk to set up house. To help deter these crawling pests from entering your storage space, stick a couple cedar wood blocks, cedar balls or cedar-filled sachets into your tack trunk alongside your horse blankets or other gear. Natural cedar oil in the wood helps repel pests as long as the cedar scent remains strong. Cedar pest deterrents are available at hardware and home stores and should be replaced regularly.

Helmet Crash Replacements—What to Do Before and After a Fall

helmet crash replacement
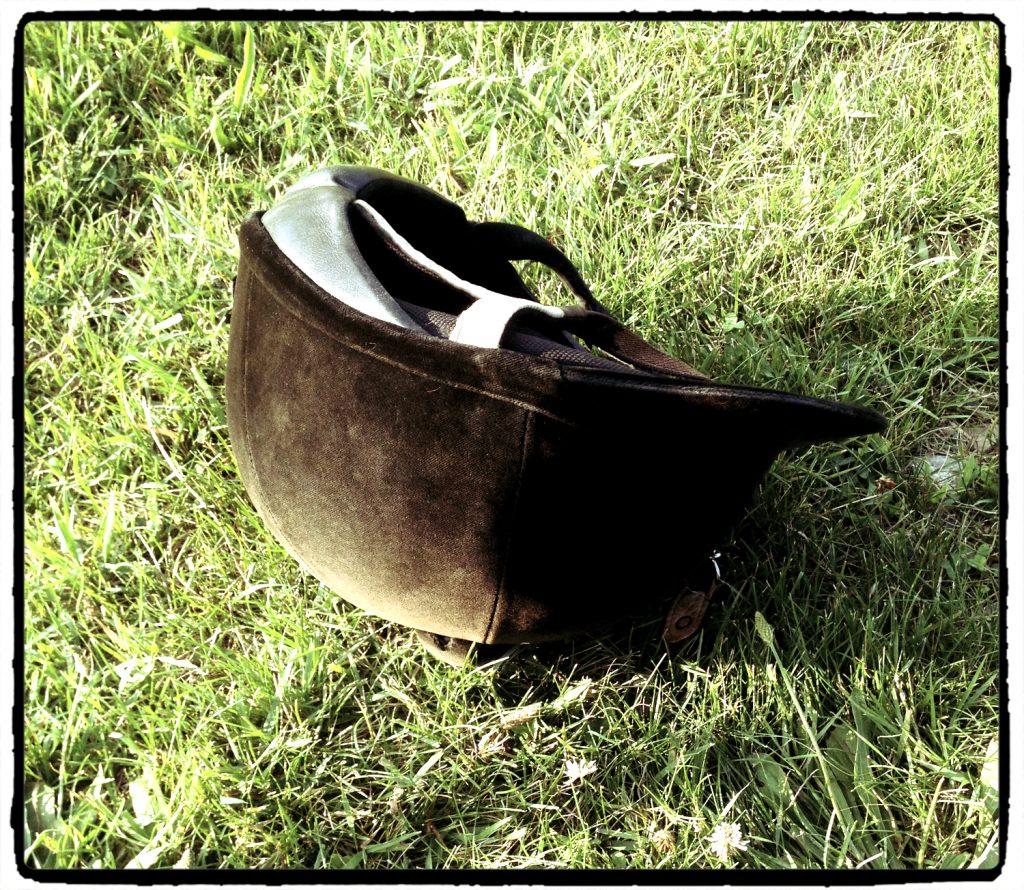
Although a riding helmet can make a fashion statement reflective of your personal style, it’s far from a simple accessory. Use of a protective helmet is always wise for riding, and in fact is mandated by the U.S.E.F. and the F.E.I. for mounted riders on show grounds. Some horse handlers even choose to wear a helmet for lungeing or while working with young or fractious horses on the ground as an added precaution. Continue reading

Helpful Riding Helmet Resources

helmet resourcesIt’s Helmet Week here at Dover! A helmet is perhaps the most important piece of equipment a rider will purchase. Choosing the right helmet requires a rider to find a model that is aesthetically pleasing, appropriate for use in his or her riding discipline—and most critically—well fitting.  A helmet purchase can represent a significant investment once all these factors are met, so proper helmet care is also critical. We’ve put together some helpful resources about riding helmets so that you can arm yourself with the knowledge to get the most out of your riding helmet. Continue reading